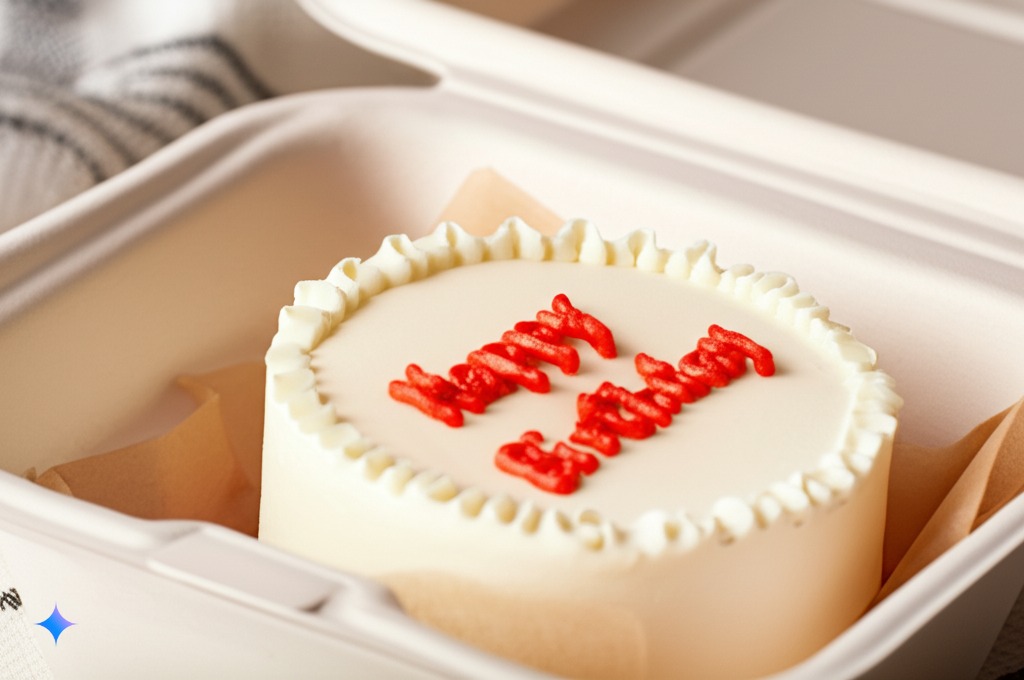


Looking for a sweet treat that's perfectly portioned and bursting with charm? Look no further than the adorable bento cake! These miniature cakes, often nestled in cute little boxes, are all the rage and surprisingly easy to make at home. Whether you're celebrating a small occasion, sending a sweet message, or simply indulging in a personal-sized dessert, this step-by-step recipe will guide you through creating your very own delightful bento cake.
Before we dive in, let's gather all the necessary ingredients and tools for both the cake and the frosting.
For the Cake (Vanilla Base):
For the Buttercream Frosting:
Essential Equipment:
First things first, preheat your oven to 350°F (175°C). While the oven is heating, take your 4-inch round cake pan and grease it thoroughly with butter or cooking spray. To prevent the cake from sticking, lightly dust the greased pan with flour. For an extra layer of protection, cut a circle of parchment paper to fit the bottom of the pan and place it inside. This will make removing the cake a breeze.
In a mixing bowl, add the softened unsalted butter and granulated sugar. Using an electric mixer (handheld or stand mixer) or a whisk, beat these two ingredients together until the mixture becomes light, fluffy, and pale yellow in color. This process, known as creaming, usually takes about 2-3 minutes. Make sure to scrape down the sides of the bowl occasionally to ensure everything is evenly incorporated. This step is crucial for a tender bento cake.
Now, crack the large egg into the bowl with the creamed butter and sugar. Beat until the egg is fully incorporated and the mixture is smooth. Next, add the vanilla extract. This simple ingredient adds a wonderful aroma and flavor to your cake. Stir it in until just combined.
In a separate small bowl, whisk together the all-purpose flour, baking powder, and salt. Whisking ensures that the baking powder and salt are evenly distributed throughout the flour, which helps the cake rise uniformly and have a balanced flavor.
Now, it's time to combine the wet and dry ingredients. Gradually add the dry ingredients to the wet ingredients in the mixing bowl. Mix on low speed if using an electric mixer, or gently fold the ingredients together with a spatula. Continue mixing until just combined. Be careful not to overmix the batter, as this can develop the gluten in the flour and result in a tough cake. A few streaks of flour are okay at this stage.
Pour the milk into the batter and stir until everything is smooth and well combined. The batter should now have a slightly thin consistency that is easily pourable.
Carefully pour the cake batter evenly into the prepared 4-inch cake pan. Gently tap the pan on the countertop a few times to release any air bubbles trapped in the batter.
Place the cake pan in the preheated oven and bake for 20-25 minutes. To check if the cake is done, insert a wooden skewer into the center. If it comes out clean with no moist batter clinging to it, the cake is ready. The top of the cake should also be lightly golden brown and spring back gently when touched.
Once the cake is out of the oven, let it cool in the pan for 5-10 minutes. Then, gently invert the cake onto a wire rack and allow it to cool completely. It's crucial that the cake is completely cool before you start frosting, otherwise the frosting will melt and slide off.
While the cake is cooling, let's make the buttercream frosting. In a clean mixing bowl, beat the softened unsalted butter with an electric mixer until it becomes light and creamy. This will take about 2-3 minutes.
Gradually add the powdered sugar to the creamed butter, one cup at a time. Start by mixing on low speed to prevent a cloud of sugar from erupting. Once most of the sugar is incorporated, increase the speed to medium and beat until the frosting becomes light, fluffy, and smooth.
Add 1 tablespoon of milk and the optional vanilla extract to the frosting. Beat until well combined. If the frosting seems too thick, add the remaining tablespoon of milk, a little at a time, until you reach your desired spreading or piping consistency.
If you want to add a touch of personality to your bento cake, now is the time to color your frosting. Divide the buttercream into separate bowls if you want multiple colors. Add a few drops of food coloring to each bowl and mix well until you achieve your desired shade. Remember, you can always add more coloring drop by drop to deepen the color.
Once the cake is completely cool, you can optionally level it. Use a serrated knife to carefully trim off any domed top to create a flat and even surface for easier frosting.
Place the cooled cake on a small plate or a turntable if you have one. Spread a thin, even layer of frosting over the top and sides of the cake. This is called the crumb coat, and its purpose is to trap any loose crumbs and create a smooth base for the final layer of frosting. Once the cake is crumb-coated, refrigerate it for 10-15 minutes to allow the frosting to firm up. This step helps prevent crumbs from mixing into your final layer of frosting.
Remove the chilled cake from the refrigerator and apply a second, thicker layer of buttercream frosting over the crumb coat. Use your small offset spatula or a knife to smooth the frosting as much as possible. A turntable can be helpful for achieving a smooth finish as you rotate the cake while holding the spatula steady.
Now for the fun part – decorating your bento cake! There are endless possibilities to make it unique and special. Here are a few ideas: